
Notice
Recent Posts
Recent Comments
Link
| 일 | 월 | 화 | 수 | 목 | 금 | 토 |
|---|---|---|---|---|---|---|
| 1 | 2 | 3 | 4 | 5 | 6 | 7 |
| 8 | 9 | 10 | 11 | 12 | 13 | 14 |
| 15 | 16 | 17 | 18 | 19 | 20 | 21 |
| 22 | 23 | 24 | 25 | 26 | 27 | 28 |
| 29 | 30 |
Tags
- 2단계 Page Table
- 자바 문제풀이
- jpa
- annotation
- Segmentation with Paging
- Inverted Page Table
- 자바 알고리즘
- 문제풀이
- 알고리즘
- Shared Page
- spring
- CS
- 웹개발
- 코드스테이츠 백엔드 과정 39기
- 스프링부트
- 메모리의 불연속적 할당
- 다단계 페이지 테이블
- 운영체제
- 스프링
- linux
- springboot
- 프로세스 동기화
- 메모리 관리
- 리눅스
- 프로세스 할당
- Allocation of Physical Memory
- 웹 프로그래밍
- Page Table의 구현
- Effective Access Time
- 프로세스 불연속 할당
Archives
- Today
- Total
GrowMe
[Spring] 스프링부트에서의 스프링 시큐리티 기본 세팅 본문
Spring Security 기본 세팅
# Gradle 추가 및 SecurityConfig 파일 생성
# 예외처리
# 로그인 화면을 커스텀 페이지로
# id, pw 인증 처리
# 비밀번호 암호화 방식 커스텀
*Gradle 추가 / SecurityConfig
- build.gradle 파일에 스프링 시큐리티 추가
implementation 'org.springframework.boot:spring-boot-starter-security'- SpringSecurityConfig 파일 생성
@Configuration
@EnableWebSecurity
public class SpringSecurityConfig extends WebSecurityConfigurerAdapter {
    @Override
    protected void configure(HttpSecurity http) throws Exception {
        http
                .authorizeRequests()	//보호된 리소스 URI에 접근할 수 있는 권한을 설정
                    .anyRequest().authenticated()	// 어떠한 URI의 요청도 인증이 필요함을 설정
                .and()
                    .formLogin()	// 폼방식 로그인을 사용할 것임을 알림
                    .defaultSuccessUrl("/view/dashboard", true)	// 로그인 성공 시 이동할 uri
                    .permitAll()	// 전체 접근 허용
                .and()
                    .logout();
    }
}- WebSecurityConfigurerAdapter를 상속해서 클래스를 생성한다.
- @Configuration : 설정 클래스임을 시스템에게 알림.
- @EnableWebSecurity : 이 어노테이션을 @Configuration 클래스에 추가하면, WebSecurityConfigurerAdapter 기본 클래스를 확장하고 개별 메서드(configure 메서드)를 오버라이딩하여 Spring Security 구성을 재정의할 수 있다.
그리고, WebSecurityConfigurer를 구현하거나 컨텍스트에 WebSebSecurityConfigurerAdapter를 확장한 빈으로 설정되어 있어야 한다. 결과적으로 웹 보안을 활성화 한다. - WebSecurityConfigurerAdapter의 오버라이딩할 configure 메서드
| 메소드 | 설명 |
| configure(WebSecurity) | 스프링 시큐리티의 필터 연결을 설정하기 위한 오버라이딩 |
| configure(HttpSecurity) | 인터셉터로 요청을 안전하게 보호하는 방법을 설정하기 위한 오버라이딩 |
| configure(AuthenticationManagerBuilder) | 사용자 세부 서비스를 설정하기 위한 오버라이딩 |
- 여기서는 먼저 configure(HttpSecurity)를 오버라이딩하였다.
*예외처리
로그인 하지 않아도 볼 수 있는 소개 페이지 등은, 로그인 하지 않아도 볼 수 있도록 하려면 스프링 시큐리티에서 인증을 진행하지 않아야한다.
1. configure(HttpSecurity http) 메소드 내에서 처리
@Configuration
@EnableWebSecurity
public class SpringSecurityConfig extends WebSecurityConfigurerAdapter {
    @Override
    protected void configure(HttpSecurity http) throws Exception {
        http
                .authorizeRequests()
                    .antMatchers("/chk", "/intro").permitAll()    // /chk 와 /intro uri는 인증 필요 X
                    .anyRequest().authenticated()	// 어떠한 URI의 요청도 인증이 필요함
                .and()
                    .formLogin()
                    .defaultSuccessUrl("/view/dashboard", true)
                    .permitAll()
                .and()
                    .logout();
    }
}- antMatchers의 인자로 '*' 와일드카드를 이용한 패턴 설정도 가능하다.
2. configure(WebSecurity web) 메소드 추가 오버라이딩 하여 별도 처리
@Configuration
@EnableWebSecurity
public class SpringSecurityConfig extends WebSecurityConfigurerAdapter {
    @Override
    public void configure(WebSecurity web) throws Exception {
        web.ignoring().antMatchers("/static/js/**","/static/css/**","/static/img/**","/static/frontend/**");
    }
}- css나 이미지 파일 등이 인증이 되지 않은 상태에서도 보여져야 하는 경우 사용한다.
-> ex : 하나의 프로젝트로 백엔드+프론트엔드 전부 처리하는 프로젝트
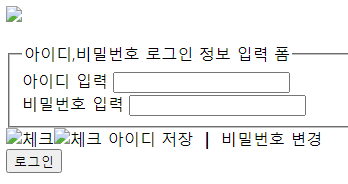
- 로그인 페이지를 커스텀 페이지로 변경 시, WebSecurity 예외처리를 하지 않을 경우 이미지 등도 인증이 필요해 지기 때문에 위와 같이 화면이 깨지게 된다.
*2번까지 진행 시, 제공되는 기본 로그인 화면
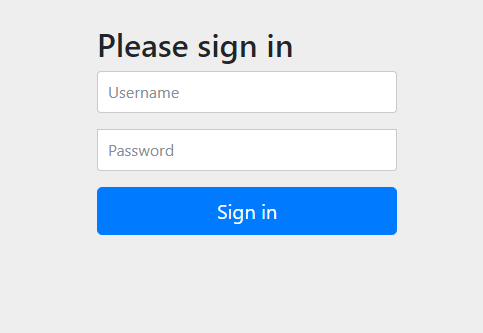
- 스프링 시큐리티에서 기본적으로 제공해주는 로그인 화면이다.
*로그인 화면 -> 커스텀 페이지로 변경
@Configuration
@EnableWebSecurity
public class SpringSecurityConfig extends WebSecurityConfigurerAdapter {
    @Override
    protected void configure(HttpSecurity http) throws Exception {
        http
                .authorizeRequests()
                    .antMatchers("/chk").permitAll()
                    .antMatchers("/manage").hasAuthority("ROLE_ADMIN")
                    .anyRequest().authenticated()
                .and()
                    .formLogin()
      // ------------------- 아래부터 커스텀 페이지 변경 설정입니다 -------------------
                    .loginPage("/view/login")
                    .loginProcessingUrl("/loginProc")
                    .usernameParameter("id")
                    .passwordParameter("pw")
      // ------------------- 아래부터 유저 ROLE에 따른 접근제어 설정입니다 -------------------
                    .defaultSuccessUrl("/view/dashboard", true)
                    .permitAll()
                .and()
                    .logout()
                    .logoutRequestMatcher(new AntPathRequestMatcher("/logoutProc"));
    }

    @Override
    public void configure(WebSecurity web) throws Exception {
        web.ignoring().antMatchers("/static/js/**","/static/css/**","/static/img/**","/static/frontend/**");
    }
}- .loginPage("/view/login") : 에서 /view/login 파일에서 커스텀 페이지로 로그인 페이지를 변경한다.
- .loginProcessingUrl("/loginProc") : 별도로 Controller에 만들어야 하는게 아니고, formLogin 방식이므로 해당 주소를 어디로 처리할지 정해주는 것. /view/login에서 '</form method="post" action=">'와 같이 form의 action을 정해주면 /loginProc 로 id와 pw를 보내게 된다.
- .usernameParameter("id") : 유저 아이디에 해당하는 form의 name을 변경한다. 이 부분은 없어도 되며, 그럼 default는 'username' 이다. 위와 같이 변경했다면 input은 <input type="text" name="id"> 로 된다.
- .passwordParameter("pw") : 마찬가지로 유저 비밀번호 부분에 해당. input은 <input type="password" name="pw">
- .antMatchers("/manage").hasAuthority("ROLE_ADMIN") : ROLE_ADMIN이라는 role을 가지고 있어야만, 해당 사용자가 /manage 이하의 uri에 접근 가능하다. ROLE은 사용자 DB에 저장해두면 된다.
(참고 : 필터는 정의된 순서에 상관없이 적용된다. 즉, 여기서는 /manage 경로에 접속 전, 로그인 관련 필터를 거치게 되고, /manage에 접근하려고할 때, 로그인한 사용자의 정보를 이용할 수 있게 되는 것) - .logoutRequestMatcher(new AntPathRequestMatcher("/logoutProc")) : /logoutProc을 호출할 시 로그아웃
예를 들어, /intro 페이지에서, 로그아웃 버튼을 누를 경우, </form method="post" action="/loginProc"> 등과 같이 처리하여 호출한다. -> 로그아웃되면 자동으로 로그인 페이지로 이동된다.
생략 가능하며, 생략 시, default로 /logout 호출 시 로그아웃 된다.
*Id, Pw 인증처리(맞는지 확인하기)
- Config 파일에 인증처리 설정 클래스를 추가
@Configuration
@EnableWebSecurity
public class SpringSecurityConfig extends WebSecurityConfigurerAdapter {
    @Autowired
    LoginIdPwValidator loginIdPwValidator;	// UserDetailsService를 상속하는 클래스. 생성해줘야한다.

    @Override
    protected void configure(HttpSecurity http) throws Exception {
        http
                .authorizeRequests()
                    .antMatchers("/chk").permitAll()
                    .anyRequest().authenticated()
                .and()
                    .formLogin()
                    .loginPage("/view/login")
                    .loginProcessingUrl("/loginProc")
                    .usernameParameter("id")
                    .passwordParameter("pw")
                    .defaultSuccessUrl("/view/dashboard", true)
                    .permitAll()
                .and()
                    .logout()
    }

    @Override
    public void configure(WebSecurity web) throws Exception {
        web.ignoring().antMatchers("/static/js/**","/static/css/**","/static/img/**","/static/frontend/**");
    }

    @Override
    public void configure(AuthenticationManagerBuilder auth) throws Exception {
        auth.userDetailsService(loginIdPwValidator);
    }
}- configure(AuthenticationManagerBuilder auth) 메서드 추가 : AuthenticationManagerBuilderd의 내부 메서드인userDetailsService 메서드를 통해, 유저가 id 및 pw를 입력 후, form 발송을 하면, 해당 id와 pw정보를 loginIdPwValidator 클래스에서 비교할 수 있게된다.
- LoginIdPwValidator는 UserDetailsService를 상속하는 클래스로, 새로 생성해주어야한다.
- LoginIdPwValidator 클래스
@Service
public class LoginIdPwValidator implements UserDetailsService {
    @Bean
    public PasswordEncoder passwordEncoder() {
        return new BCryptPasswordEncoder();
    }

    @Autowired
    private UserMapper mapper;

    @Override
    public UserDetails loadUserByUsername(String insertedId) throws UsernameNotFoundException {
        UserInfo user = mapper.getUserInfo(insertedId);

        if (user == null) {
            return null;
        }

        String pw = user.getPw(); //"d404559f602eab6fd602ac7680dacbfaadd13630335e951f097af3900e9de176b6db28512f2e000b9d04fba5133e8b1c6e8df59db3a8ab9d60be4b97cc9e81db"
        String roles = user.getRoles(); //"USER"

        return User.builder()
                .username(insertedId)
                .password(pw)
                .roles(roles)
                .build();
    }
}- passwordEncoder() 메서드 : 유저 pw의 암호화 방식을 정하는 메서드. 일반적으로 BCryptPasswordEncoder를 사용한다고 한다. 암호화 방식을 빈에 등록하여 사용할 수 있게 한다.
- insertedId : 사용자가 입력한 Id가 위의 userDetailsService를 통해, 해당 인자로 들어오게 된다.
- UserMapper : DB에 접근하여, 액세스하는 기능을 가진 클래스. getUserInfo를 통해 저장된 유저DB를 가져온다.
- 여기서 유저 인증에 대한 처리는 암호화된 id와 pw가 DB에 미리 저장되어 있다고 가정하고, 그 값을 비교하는 방식으로 처리하였다.
- pw의 비교는 @Bean으로 지정한 PasswordEncoder쪽에 스프링 시큐리티에서 우리가 넣은 DB의 pw와 유저가 입력했던 pw를 넣어 비교한다.
- (주의) 만약, DB에 저장된 pw가 암호화되지 않았다면, loadUserByUsername 내에서 직접 인코딩을 진행 해주어야 한다. 그렇게 해야, 프로젝트 운영자 등, 알면 안되는 사람들에게도 유저의 정보가 암호화 될 수 있기 때문이다.
- 비교 로직을 처리한 후, 저장된 엔티티 USER 타입에 정보를 넣어 최종 반환을 한다.
*비밀번호 암호화 방식 커스텀
- LoginIdPwValidator 클래스
...

@Bean
public PasswordEncoder passwordEncoder() {
	return new SHA512PasswordEncoder();
}

...- passwordEncoder() 메서드의 반환하는 객체를 변경한다.
- SHA512PassswordEncoder 클래스
public class SHA512PasswordEncoder implements PasswordEncoder {
    private final Log logger = LogFactory.getLog(getClass());

    @Override
    public String encode(CharSequence rawPassword) {
        if (rawPassword == null) {
            throw new IllegalArgumentException("rawPassword cannot be null");
        }
        return this.getSHA512Pw(rawPassword);
    }

    @Override
    public boolean matches(CharSequence rawPassword, String encodedPassword) {
        if (rawPassword == null) {
            throw new IllegalArgumentException("rawPassword cannot be null");
        }
        if (encodedPassword == null || encodedPassword.length() == 0) {
            this.logger.warn("Empty encoded password");
            return false;
        }

        String encodedRawPw = this.getSHA512Pw(rawPassword);
        if (encodedPassword.length() != encodedRawPw.length()) {
            return false;
        }
        for (int i = 0; i < encodedPassword.length(); i++) {
            if (encodedPassword.charAt(i) != encodedRawPw.charAt(i))
                return false;
        }
        return true;
    }

    private String getSHA512Pw(CharSequence rawPassword) {
        MessageDigest md = null;
        try {
            md = MessageDigest.getInstance("SHA-512");
            md.update(rawPassword.toString().getBytes());
        } catch (Exception e) {
            this.logger.warn(e.getMessage());
        }

        byte[] msgb = md.digest();

        StringBuilder sb = new StringBuilder();
        for (int i = 0; i < msgb.length; i++) {
            String tmp = Integer.toHexString(msgb[i] & 0xFF);
            while (tmp.length() < 2)
                tmp = "0" + tmp;
            sb.append(tmp.substring(tmp.length() - 2));
        }
        return sb.toString();
    }
}- PasswordEncoder를 상속받아 오버라이딩하여 구현하면 된다.
- encode 메서드 : 문자를 인코딩하는 메서드
- getSHA512Pw : 비밀번호 rawPassword가 들어오면, SHA512 방식에 맞춰 암호화하는 하나의 예시이다.
- rawPassword : 사용자가 입력한 비밀번호가 들어오게 된다. 스프링 시큐리티에서 알아서 넣어 처리한다.
- encodeedPassword : DB에 저장되있던 암호화되어 있는 비밀번호. 위 LoginPwValidator 클래스에서 User.Builder() 부분의 .password(pw)의 pw를 통해 인자로 전달된다.
- matches 메서드 : 사용자 입력 비밀번호와 DB에 저장된 암호화된 비밀번호를 비교하여 다를경우 false 같으면 true
'Security' 카테고리의 다른 글
| OAuth2를 스프링부트 프로젝트에 적용하기(with JWT 토큰) (0) | 2022.10.02 |
|---|---|
| JWT를 SpringBoot 프로젝트에 적용하기(2) - Refresh Token 적용 (0) | 2022.09.19 |
| JWT를 SpringBoot 프로젝트에 적용하기(1) - Access 토큰 적용 (0) | 2022.08.24 |
| [Spring] 스프링 시큐리티의 개념과 구조 (0) | 2022.07.05 |
'Security' Related Articles
more


Comments